You rely on your car every day, so keeping it in top shape is important—and changing your oil is one of the easiest ways to protect your engine. But if you’ve never done it before, the process might seem tricky or even intimidating.
What if you miss a step or make a mistake? Don’t worry—this guide breaks down how to change your oil clearly and simply, step by step. By the time you finish reading, you’ll feel confident enough to do it yourself, save money, and keep your car running smoothly.
Ready to take control of your car’s maintenance? Let’s get started!
Gather Supplies
Before starting an oil change, gather all necessary supplies. This step makes the process smooth and safe. Having the right materials avoids delays and mistakes. Prepare each item carefully to ensure a successful oil change.
Choose The Right Oil
Check your owner’s manual for the correct oil type. Use oil with the right viscosity number. Select oil that meets your car’s specifications. Using proper oil protects your engine and improves performance. Buy oil from trusted brands to ensure quality.
Select The Correct Filter
Find the oil filter designed for your vehicle model. The wrong filter may cause leaks or poor filtration. Match the filter number with the manual’s recommendation. A good filter keeps dirt and debris out of the engine. Replace the filter every time you change the oil.
Prepare Tools And Safety Gear
Gather tools like a wrench, oil drain pan, and funnel. Use a jack and jack stands to lift your car safely. Wear gloves and safety glasses to protect your hands and eyes. Keep rags handy to clean spills quickly. Having the right tools and gear keeps you safe and efficient.
Prepare Your Vehicle
Preparing your vehicle is the first step to a smooth oil change. Taking simple safety measures helps avoid accidents and makes the process easier. These steps set the right conditions for draining and refilling the oil correctly.
Start by making sure the vehicle is stable and safe. Next, secure the car so it does not move while you work. Finally, give the engine time to cool slightly to prevent burns but keep the oil warm enough to flow well.
Park On Level Ground
Choose a flat, level surface to park your car. This helps the oil drain completely and evenly. Avoid slopes or uneven areas to prevent the car from rolling or tilting.
Engage Parking Brake
Set the parking brake firmly. This keeps the vehicle from moving during the oil change. It adds an important layer of safety while you work under the car.
Let Engine Cool Slightly
Turn off the engine and wait about 10 to 15 minutes. The oil will still be warm, which helps it drain faster. Avoid changing oil immediately after driving hard to prevent burns from hot oil or engine parts.
Lift And Secure Car
Lifting and securing your car is the first and most important step before changing the oil. It gives you safe access to the oil drain plug and filter underneath the vehicle. Properly lifting the car prevents accidents and ensures you can work comfortably.
Always use the right tools and follow safety guidelines. Never rely on just a jack to hold the car. Use jack stands to support the weight securely. This step protects you while you drain old oil and replace the filter.
Use A Jack
Find a flat, stable surface to park your car. Engage the parking brake. Locate the jacking points under your vehicle. These spots are usually marked in your owner’s manual.
Place the jack under the jacking point. Pump the jack handle slowly to lift the car. Raise it high enough to fit your tools and hands underneath.
Do not rush or lift unevenly. Check that the car is steady before moving on.
Place Jack Stands Safely
Once the car is raised, position the jack stands under the frame or solid support points. Avoid placing them under fragile parts like the exhaust or brake lines.
Lower the car slowly onto the jack stands. Ensure the car rests firmly on both stands. Give the car a gentle push to test stability.
Never work under a car supported only by a jack. Jack stands keep you safe. Always double-check their placement before crawling underneath.
Credit: www.caranddriver.com
Drain Old Oil
Draining old oil is a key step in changing your car’s oil. It removes used oil that can harm your engine. This process clears the path for fresh oil to keep your engine running smoothly.
Take your time and follow each step carefully to avoid spills and mess. Use the right tools to make the job easier and safer.
Locate Drain Plug
Find the drain plug under the car’s oil pan. It is usually a large bolt at the bottom of the pan. Use a flashlight if needed to see it clearly.
Check your owner’s manual for the exact location if you have trouble. Make sure the car is stable before crawling underneath.
Position Drain Pan
Place a drain pan right below the drain plug. The pan must be large enough to hold all the old oil. Center it carefully to catch every drop.
This step helps keep your workspace clean and prevents oil from spilling on the ground. Use gloves to protect your hands from dirty oil.
Remove Plug And Drain Oil
Use a wrench to loosen the drain plug carefully. Turn it counterclockwise until it comes out. Be ready for oil to start flowing out immediately.
Let the oil drain completely into the pan. This may take a few minutes. After the flow stops, replace the plug and tighten it securely.
Dispose of the old oil properly by taking it to a recycling center or auto shop.
Replace Drain Plug
Replacing the drain plug is an important step after draining the old oil. It stops oil from leaking out and keeps the engine sealed. Doing this carefully protects your car’s engine and prevents messes.
Clean Plug And Area
Before putting the drain plug back, clean it well. Remove any dirt, oil, or metal shavings from the plug and the area around the drain hole. A clean surface helps the plug seal tightly and avoids leaks.
Install New Gasket
Always use a new gasket or washer on the drain plug. The gasket seals the connection and stops oil from leaking. Place it correctly on the plug before screwing it in.
Tighten Plug Properly
Do not overtighten the drain plug. Tighten it firmly but carefully with a wrench. Too much force can strip the threads or damage the oil pan. Check your car manual for the right torque if possible.

Credit: www.wyotech.edu
Change Oil Filter
Changing the oil filter is a key step in maintaining your car’s engine. The oil filter traps dirt and debris, keeping your engine oil clean. Replacing it regularly helps your engine run smoothly and last longer. Follow these simple steps to change the oil filter correctly.
Remove Old Filter
Use an oil filter wrench to loosen the old filter. Turn it counterclockwise until it comes off. Be ready with a drain pan to catch any oil that spills out. Remove the filter carefully to avoid spills. Check the old filter to see if the rubber gasket came off with it.
Lubricate New Gasket
Dip your finger in clean engine oil. Lightly coat the new filter’s rubber gasket with this oil. This helps the filter seal better and prevents leaks. It also makes it easier to remove next time. Do not over-lubricate; a thin, even layer is enough.
Install New Filter
Screw the new filter onto the filter base by hand. Turn it clockwise until it touches the base. Then tighten it an extra three-quarters of a turn. Avoid using tools for the final tightening to prevent damage. Check for leaks after installation by running the engine briefly.
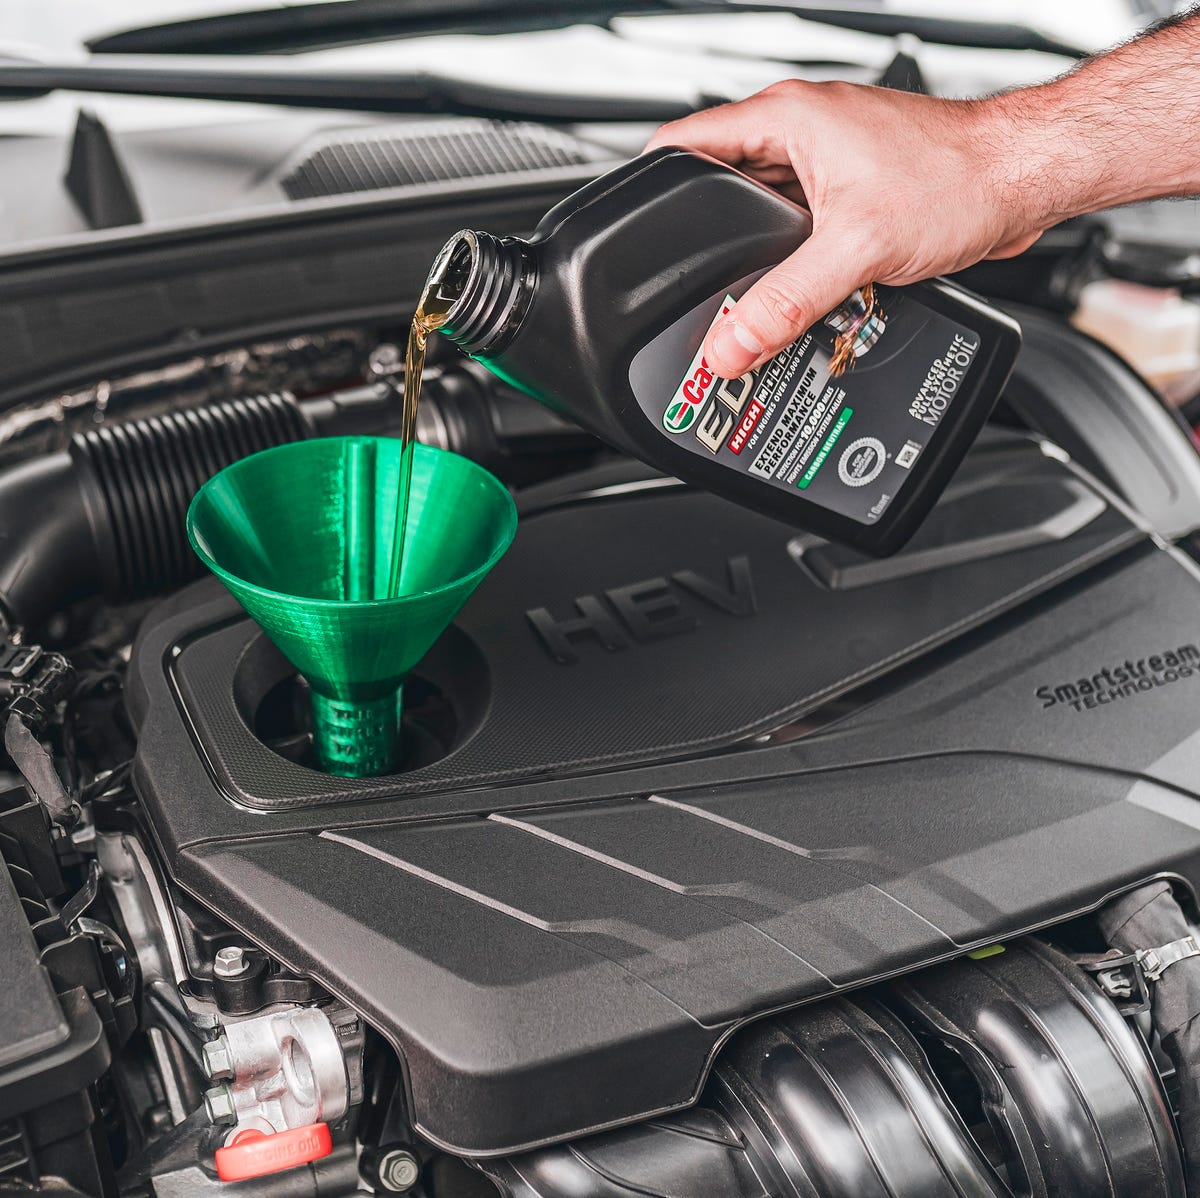
Add New Oil
Adding new oil is a key step in changing your car’s oil. Use the right type and amount of oil for your engine. Pouring oil carefully helps avoid spills and keeps the engine clean. Follow these steps to add new oil correctly.
Open Oil Fill Cap
Locate the oil fill cap on top of the engine. Twist the cap counterclockwise to open it. Set the cap aside where it won’t get dirty. This opening is where you pour the new oil.
Use Funnel To Pour Oil
Place a clean funnel into the oil fill hole. The funnel guides the oil and prevents spills. Slowly pour the oil through the funnel. Pour steadily to avoid splashing and overfilling.
Start With Slightly Less Oil
Pour less oil than the amount your car needs at first. It is easier to add more oil than to remove excess. Check the oil level with the dipstick after adding. Add more oil gradually to reach the correct level.
Check Oil Level
Checking the oil level is a key step when changing your car’s oil. It ensures the engine has enough oil to run smoothly. Proper oil level protects the engine from damage and keeps it working efficiently.
Use the dipstick to measure the oil level. This simple check helps you know if you need to add oil before finishing the job.
Run Engine Briefly
Start the engine and let it run for about a minute. This warms the oil and helps it spread through the engine. Turn off the engine and wait a few minutes. This pause allows the oil to settle back into the oil pan.
Wait And Recheck Dipstick
Pull out the dipstick and wipe it clean with a rag. Insert it fully back into the tube, then pull it out again. Look at the oil mark on the dipstick. The oil should be between the minimum and maximum marks. This shows the correct oil level.
Add Oil If Needed
If the oil level is below the minimum mark, add the right type of oil. Pour slowly and check the level often to avoid overfilling. Stop adding oil once the level reaches the maximum mark. This keeps your engine safe and running well.
Clean Up
Cleaning up after changing your oil is a crucial step. It keeps your workspace safe and protects the environment. Proper cleanup also helps maintain your tools and car for future use.
Dispose Old Oil Responsibly
Used oil is hazardous and must never be poured down drains or on the ground. Store the old oil in a sealed container, such as the original oil bottle or a clean jug. Take it to a local recycling center or auto shop that accepts used oil. Many service stations and parts stores offer free oil recycling. This prevents pollution and keeps harmful chemicals out of water sources.
Store Tools And Materials
Clean your tools with a rag or paper towel. Wipe off any oil residue to prevent dirt buildup. Store all tools in a toolbox or designated area. Keep funnels, gloves, and rags together for easy access next time. Proper storage extends the life of your equipment and keeps your workspace tidy. Dispose of oily rags safely, as they can be a fire hazard. Seal them in a plastic bag or metal container before disposal.
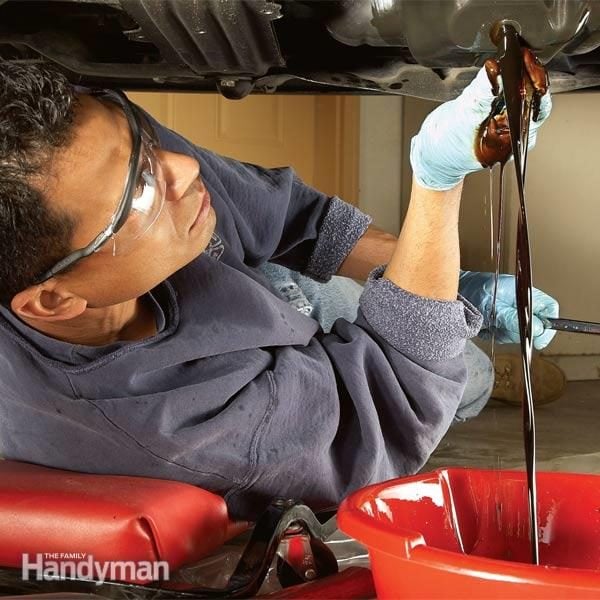
Tips For First-timers
Changing oil for the first time can feel overwhelming. Simple tips help make the process smooth and safe. Follow clear steps to avoid mistakes and protect yourself. Preparation is key to success and confidence.
Consult Owner’s Manual
Start by reading the owner’s manual. It has specific instructions for your vehicle. Find the right oil type and quantity. Learn where the oil filter and drain plug are. Manuals also list safety warnings. This guide keeps you on the right path.
Wear Protective Gear
Wear gloves to protect your hands from hot oil and dirt. Use safety glasses to shield your eyes. Old oil can irritate skin and eyes. Long sleeves and closed shoes add extra safety. Proper gear keeps you safe and clean.
Work In A Well-ventilated Area
Perform the oil change outdoors or in a garage with open doors. Fresh air helps avoid breathing harmful fumes. Engine oil has strong smells that can cause dizziness. Good airflow improves comfort and safety. Avoid enclosed spaces to reduce risks.
Credit: www.familyhandyman.com
Frequently Asked Questions
How Do I Change My Oil Myself?
Lift your car safely and drain old oil by removing the drain plug. Replace the oil filter, lubricate its gasket, and refill with new oil. Run the engine briefly, check the dipstick level, and clean up. Always follow your owner’s manual instructions.
Can A Beginner Change Oil?
Yes, beginners can change oil by following safety steps, using proper tools, and consulting the owner’s manual carefully.
Is Changing Oil Myself Worth It?
Changing oil yourself saves money and ensures quality control. It requires time, tools, and safety precautions. DIY oil changes suit those comfortable with car maintenance.
Do You Normally Tip Oil Change Guys?
Tipping oil change technicians is not mandatory but appreciated for excellent service. A tip of $5 to $10 is common.
Conclusion
Changing your car’s oil helps keep the engine healthy and running smooth. Follow each step carefully to avoid mistakes. Use the right oil type and tools for your vehicle. Regular oil changes improve performance and extend engine life. Always work safely and clean up properly afterward.
With practice, this task becomes easier and saves money. Keep your car in good shape by changing oil on time. Simple care makes a big difference in how your car drives.